This checklist is for students and families planning a science fair project that involves measuring, observing, or presenting results. Use it to think through which supplies fit the work your project actually requires.

Prime made for students and young adults
- Fast, free delivery for dorm and study essentials
- Prime Video and Amazon Music included
- Member-only deals
The sections follow common project needs: measuring ingredients or samples, holding liquids, protecting eyes, checking pH, viewing specimens, and building a display. Each product pick is named in its relevant section, with the display board covered through selection advice.
Start with your project instructions, then check what materials you already have. Match each item to the task, review the product details for size and compatibility, and involve an adult when handling lab materials or setting up equipment.
Digital Kitchen Scale
A scale can help when your project calls for comparing quantities by mass or following a repeatable recipe. The OXO Good Grips 11-Pound Digital Kitchen Food Scale is the pick for this slot. Before choosing any scale, confirm that its capacity and displayed increments make sense for the amounts your project will measure.
A common mistake is assuming that every scale can measure very small samples precisely. Read the product specifications and compare them with your project plan; a scale’s maximum capacity does not tell you how finely it measures. Also consider the object’s footprint and whether the weighing surface can accommodate the container you intend to use. If your project requires measuring powders or liquids, check whether the chosen container can be placed securely and whether you will record the container’s mass separately.
Keep the scale on a stable, level surface and follow its instructions for setup and cleaning. Ask an adult to help decide whether the listed capacity and measurement increments suit the experiment. Choose based on the measurements you need, not on the assumption that a kitchen scale will meet every lab requirement.
What to look for:
- Capacity that covers the largest planned sample and container
- Displayed measurement increments suited to the amounts being compared
- A weighing surface large enough for the project’s container
- Clear instructions for setup, units, and cleaning
- A stable place to use the scale during repeated measurements
OXO Good Grips 11-Pound Digital Kitchen Food Scale

This digital kitchen scale weighs food up to 11 pounds in 1/8-ounce or 1-gram increments. Its pull-out display helps prevent shadows from large bowls, while the tare function, remaining-capacity indicator, and easy-to-clean platform make food preparation convenient.
Pros:
- Pull-out display helps prevent shadowing from large containers
- Measures in both US and metric increments
- Tare function supports weighing ingredients in a container
- Thin profile and easy-to-clean platform simplify storage and cleanup
Cons:
- Maximum capacity is limited to 11 pounds
- Requires four AAA batteries
Best for: Projects comparing amounts by mass
Not ideal for: Work requiring very fine measurements unless specifications confirm suitability
Bottom line: Check the scale’s capacity and increments against your project’s measurement plan before choosing it.
Glass Beaker Set
Beakers can provide containers for holding or comparing liquids when they are appropriate for the project. The named pick is the Frienda 30 Pcs Lab Glassware Beaker Set. A set with multiple pieces may suit projects that call for several containers, but verify the included sizes and types against your actual procedure rather than assuming every piece will be useful.
One common buying mistake is selecting glassware based only on the number of pieces. Check the product details for the capacity of each beaker, what is included, and whether the glassware is intended for the conditions your project involves. Consider where the set will be stored and how the pieces will be handled; glass can break, so adult supervision and a clear, stable work surface matter. Do not assume that lab-style glassware is suitable for heating or any particular chemical simply from the product name.
Plan the containers around your steps: how many samples will be handled at once, what volume each needs to hold, and whether you need to keep samples separate. Follow the product instructions and your project guidance, and ask an adult to review any use involving unfamiliar materials. Choosing by capacity and intended use helps avoid a set that is plentiful but mismatched to the experiment.
What to look for:
- Capacities of the individual beakers listed clearly
- Included pieces that match the number of samples in the procedure
- Product guidance for intended use and handling
- A safe, stable location for use and storage
- Adult guidance for any project involving unfamiliar materials
Frienda 30 Pcs Lab Glassware Beaker Set

This set includes 30 pieces of laboratory glassware such as beakers, graduated cylinders, glass stirring rods, droppers, and measuring cups in various sizes. Made of durable borosilicate glass, these tools are suitable for scientific experiments and laboratory use, featuring clear measurement scales for easy reading.
Pros:
- Complete set with multiple sizes for various experiments
- Made of durable, acid and alkali resistant borosilicate glass
- Clear measurement scales for easy reading
Cons:
- No individual item descriptions or specific use instructions
- Limited to laboratory and scientific use only
Best for: Projects needing several liquid containers
Not ideal for: Projects that do not need glassware or multiple vessels
Bottom line: Confirm the included sizes and intended use before deciding whether this set fits your procedure.
Safety Goggles
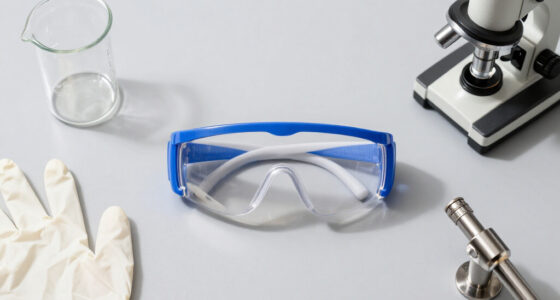
Eye protection belongs on the checklist whenever project guidance calls for protecting eyes. The pick is Anti-Fog Indirectly Vented Lab Safety Goggles Over Glasses. The name indicates a design intended to fit over glasses, but individual fit can vary, so check the product details and try them on with the glasses that will be worn during the project.
A frequent mistake is treating goggles as interchangeable or assuming a product name confirms suitability for every hazard. Review the product information and your school or project safety instructions to make sure the goggles match the planned activity. Check that they sit securely without shifting, allow a clear view, and work with prescription glasses if needed. If the fit feels uncomfortable or leaves gaps, ask an adult or teacher for guidance before beginning.
Keep goggles accessible at the work area and follow their care instructions so they remain ready to use. They are one part of safe project setup, alongside following directions and getting adult help with unfamiliar materials or procedures. Select for secure fit and task suitability, and make sure the student can wear them as instructed throughout the activity.
What to look for:
- Product details that match the activity’s safety guidance
- A fit that stays secure during normal movement
- Room for the prescription glasses the student wears
- Clear sight while goggles are in place
- Care and use instructions that can be followed
Anti-Fog Indirectly Vented Lab Safety Goggles Over Glasses

These safety goggles are made of environmentally friendly PVC, offering a soft, bendable, and comfortable fit. They are adjustable to fit various head sizes and provide protection against splashes, smoke, dust, and other hazards in laboratories, workshops, and kitchens.
Pros:
- Made from environmentally friendly, soft, and bendable PVC material
- Adjustable head size for a comfortable fit
- Provides protection against splashes, dust, and smoke
Cons:
- No specific durability information provided
- May not be suitable for high-impact activities
- Limited details on lens clarity or anti-fog effectiveness
Best for: Students whose project guidance calls for eye protection
Not ideal for: Anyone whose glasses and goggles do not fit securely together
Bottom line: Check the fit over the student’s glasses and confirm suitability with project safety guidance.
pH Test Strips
pH strips can be useful when a project involves comparing samples by pH. The named pick is pHydrion 9800 Plastic pH Indicator Strips, 0.0 to 14.0, Flip Top Vial. Check the product information for how to use and interpret the strips, and make sure the listed range aligns with the comparison your project is designed to make.
A common mistake is treating a color change as an exact measurement without following the instructions. Lighting, timing, sample preparation, and how the result is recorded can affect comparisons, so keep the procedure consistent for every sample. Confirm that the strips are intended for the substances you plan to test, and do not assume the product name establishes suitability for all liquids. If the project uses unfamiliar substances, ask a teacher or adult to review the method first.
Before starting, decide how many samples and repeat checks the procedure requires, then check that the available strips and storage instructions suit that plan. Keep the vial closed and follow the label directions. Record observations consistently and describe results in a way that reflects what the strips show. A careful method and consistent comparisons matter as much as choosing a strip with a range that fits the question.
What to look for:
- A listed pH range that fits the project question
- Clear directions for timing and interpreting color changes
- Suitability information for the samples being tested
- Enough strips for planned samples and repeat checks
- Storage directions that are practical for the work area
pHydrion 9800 Plastic pH Indicator Strips, 0.0 to 14.0, Flip Top Vial Packaging

These pH indicator strips provide immediate, accurate pH testing with bright, long-lasting colors. Packaged in a flip-top vial, each set contains 100 dip sticks with a matching color chart for easy reading.
Pros:
- Bright, long-lasting color indicators for easy reading
- Includes a matching color chart for accurate pH determination
- Convenient flip-top vial for storage and portability
- High quantity of strips per pack
Cons:
- Limited to pH testing only
- Color matching may vary slightly under different lighting conditions
Best for: Projects comparing sample pH
Not ideal for: Work needing a measurement method the product instructions do not support
Bottom line: Match the listed range and instructions to the samples and comparisons in your procedure.
Microscope Slides
The product named for this slot is the Woehrsh Compound Microscope with WF10x and WF25x Eyepieces. Its name describes a microscope, rather than a set of microscope slides, so check the product listing carefully before buying. Confirm what the package includes and whether it supplies the microscope, slides, or both; do not assume the title means prepared slides are included.
Another common mistake is choosing magnification details without checking whether the microscope suits the project’s specimens and the student’s ability to use it. Review the product specifications, setup requirements, and any included accessories. Consider where the microscope will sit, how it will be stored, and whether an adult can help with setup and handling. If your procedure specifically requires slides, identify those separately unless the listing confirms they are part of the package.
Plan the observation workflow before purchase: what specimens will be viewed, what equipment the instructions call for, and what materials must be supplied separately. Ask a teacher or adult to confirm compatibility with the project. The key is to verify the complete observation setup from the product details rather than relying on a section label that may not match the listed item.
What to look for:
- A clear list of everything included in the package
- Confirmation whether microscope slides are included
- Specifications that match the project’s observation needs
- Setup and handling guidance for the student
- Any separately required specimen or slide supplies
Woehrsh Compound Microscope with WF10x and WF25x Eyepieces

This compound microscope has 4x, 10x, and 40x objectives, WF10x and WF25x eyepieces, and dual LED illumination for viewing translucent and opaque specimens. It includes adjustable brightness, a swivel head, coarse and fine focusing, and a kit with slides, lab tools, a phone holder, charger, and carrying bag.
Pros:
- Includes multiple objectives and two eyepieces for varied magnification
- Dual illumination supports viewing translucent and opaque objects
- Includes slides, lab tools, and other accessories
- Has a swivel head and coarse and fine focusing
Cons:
- Maximum magnification differs between the description and specifications
- The product information does not clearly explain the two power supply options
Best for: Projects that need a compound microscope
Not ideal for: Shoppers seeking slides when the listing does not confirm they are included
Bottom line: Check whether this microscope package includes slides and matches the project’s observation requirements.
Tri-Fold Display Board
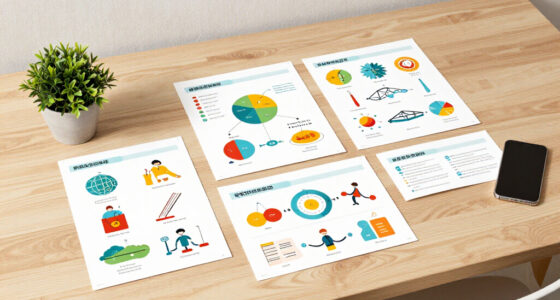
A tri-fold display board gives a project a defined space for its question, method, observations, and conclusion. No specific product is named for this slot, so choose based on your school’s instructions and the amount of material you plan to show. Start by checking any required board dimensions or presentation rules before shopping.
A common mistake is picking a board before laying out the content. Sketch the sections and estimate how much space photos, charts, labels, and text need; then compare that layout with the board dimensions. Check that the board can stand on its own in the display setting and that its folds work for the intended arrangement. Avoid planning around materials or attachments that your school does not allow.
Keep the layout readable from a comfortable distance and leave room between sections. Make headings easy to scan, use concise text, and ensure charts or images are large enough to support the explanation. Assemble the display only after the project content is settled, so the board reflects the final work. The best choice is the one that fits your rules and layout and gives each part of the project a clear place.
What to look for:
- Dimensions that meet school or fair requirements
- Enough panel space for planned text, charts, and images
- A structure that stands securely in the display setting
- Folds that suit the planned layout
- Materials and attachments permitted by the school
Buy in order of project need: first gather items required for the experiment and safety guidance, then add measuring or observation tools that match the procedure, and finish with presentation materials. Check what you already have and confirm compatibility and package contents before filling gaps.
A clear plan makes shopping easier: follow the project instructions, ask a teacher or adult about uncertain equipment, and choose supplies that support the work you will actually do. With the essentials in place, you can focus on careful observations and explaining what you learn.
Evergreen bestsellers Picks

Ninja Crispi Glass Air Fryer (Stone) – 4‑in‑1

Vitamix Propel Series 510 Professional-Grade Blender, 3 Programs, Black
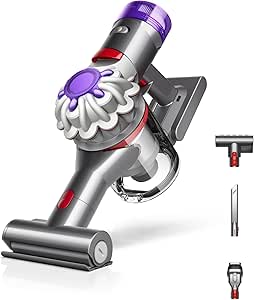
Dyson Car+Boat Cordless Handheld Vacuum
As an affiliate, we earn on qualifying purchases.